How to Host Static HTML Website on AWS Amplify
Implementing CICD for hosting a static website was a complex set of tasks using Cloud Front and S3 until AWS Amplify made it look so easy.

A technology evangelist and entrepreneur passionate about software development using cloud-native technologies. Currently leading a cross-Atlantic team of enthusiasts developing and extending the core of Kubernetes at kaiops.io
There are many low cost static website hosting options available but most of them require complicated process of uploading the website, configuring the domain names and managing the SSL certificates etc. Amazon Amplify simplifies these tasks by providing simple CI/CD, allowing you to connect your Code Repository, it also provides automatic Build Pipelines for multiple environments and above all it provides out of the box SSL Certificate for your custom domains.
Deploying a static website on AWS Amplify is a straightforward process that can be broken down into the following steps:
1. Create a new Amplify app.
Log in to the AWS Amplify Console and create a new app by selecting the Host Web App option and by providing a name, environment, and repository for your website.
2.Connect your repository
Connect your repository to the app by linking it to your GitHub, GitLab, or Bitbucket account, or by manually uploading your website files. Here are the steps to connect your GitHub repository in AWS Amplify:
Go to the Amplify Console and select the app that you want to connect to your GitHub repository.
Click on the "Connect branch" button.
Select "GitHub" from the list of repository providers.
Use your GitHub account to sign in, and authorize Amplify to access your GitHub repositories.
Select the repository that contains your website or app, and choose the branch that you want to connect.
Click on the "Next" button and configure the build settings, environment variables, and other options as needed.
Click on the "Save and Deploy" button to start the build and deploy process.
After the deployment is complete, you can monitor the build and deploy process, and make updates to your app through the Amplify console.
Heres the screen shot of the options available for Code Repository options:

It's important to note that in order to connect to your GitHub repository, you need to have a GitHub account, and your repository should be public or accessible by AWS Amplify.
3. Build and Deploy your App
Once your repository is connected, Amplify will automatically build and deploy your app. You can also configure custom build settings and environment variables if needed. Please comment if you need any support in your custom build process.
4. Configure custom domains
Amplify will provide a default domain for your app, but you can also configure custom domains if needed. Here are the steps to configure custom domains for a deployed app on AWS Amplify:
Go to the Amplify Console and select the app that you want to configure a custom domain for.
Click on the "Domain settings" tab and then click on the "Connect domain" button.
Enter the domain name that you want to use for your app. Amplify will automatically check the availability of the domain and suggest a domain if it's not available.
If the domain is available, Amplify will provide you with a set of instructions to verify that you own the domain. This typically involves adding a CNAME or A record to your domain's DNS settings.
Once the domain is verified, Amplify will automatically create a certificate for your custom domain.
Once the certificate is ready, you can associate the custom domain with your app by clicking on the "Associate" button.
Now, your custom domain is configured and should be active within a few minutes. You can test it by visiting the custom domain in your browser.
Here is a screenshot of how I have added my custom domain and mapped the branches to each of the sub-domains:
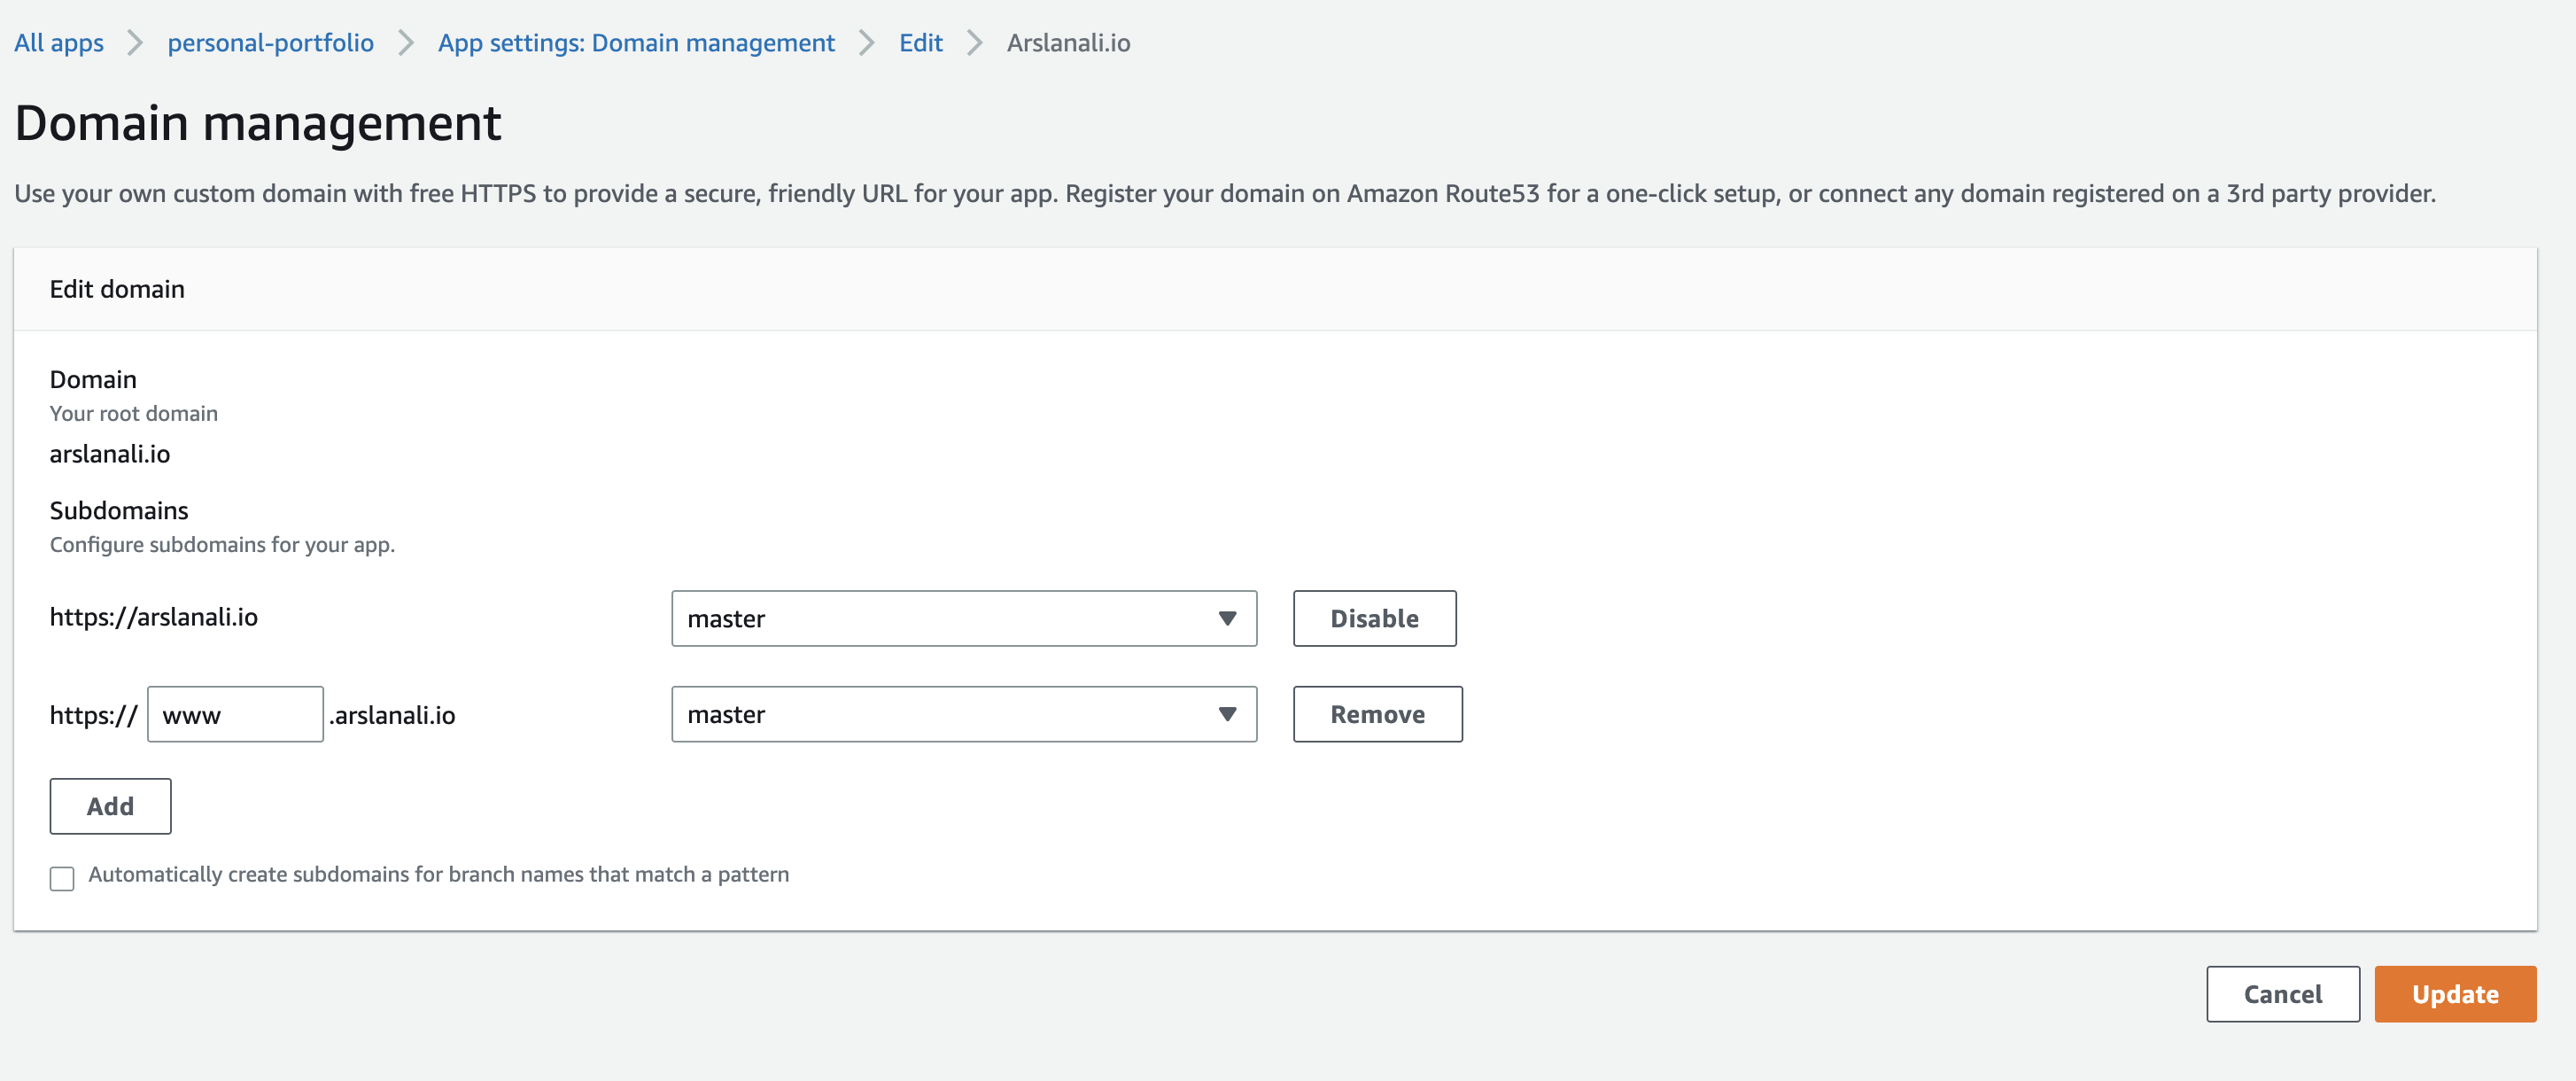
It's important to note that you will need to have access to your domain's DNS settings to configure custom domains in Amplify. Also, Amplify require a valid SSL certificate for custom domains, it will create one for you automatically but you can also use your own certificate.
5. Monitor and update your app
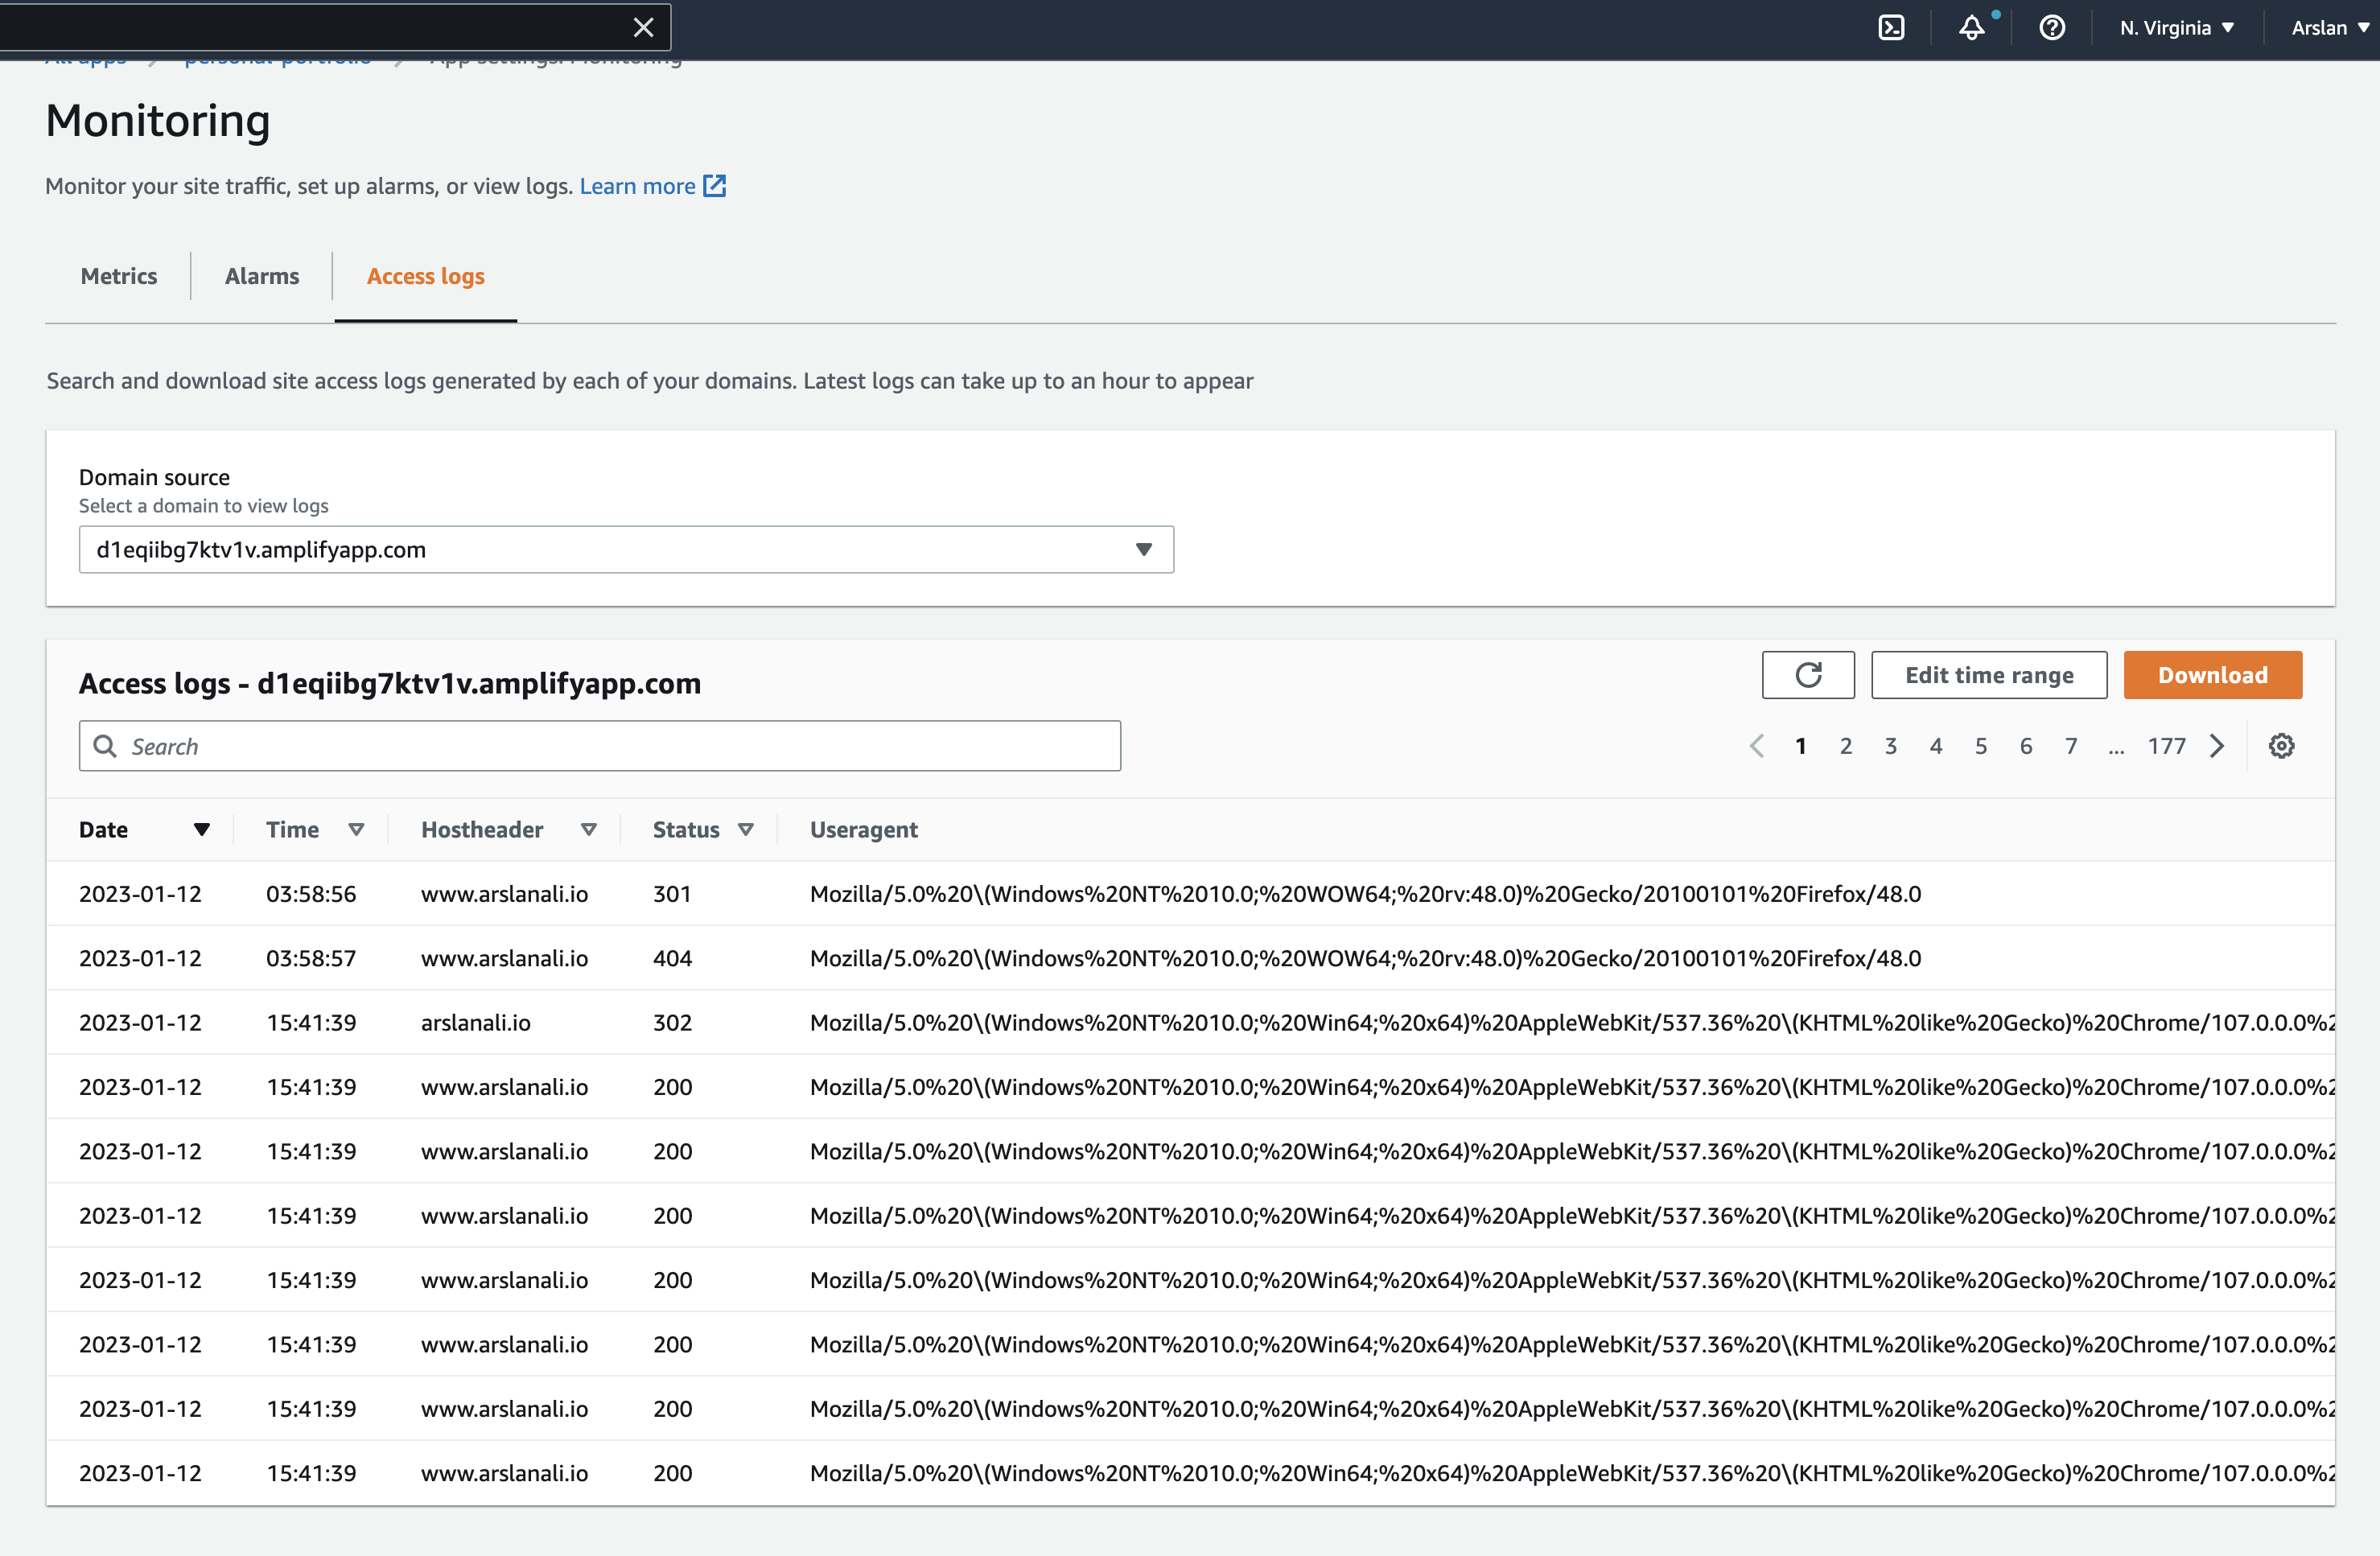
After your app is deployed, you can monitor it's performance, view analytics, and make updates through the Amplify console. You can also monitor the application's access logs and set alarms based on different metrics like 40x and 50x errors etc.
Below are the screen shots of the access logs and the site analytics of my personal portfolio website I deployed on Amplify earlier.

6. Enable CloudFront distribution
By default CloudFront distribution is enabled for you application if you are using Route 53 to configure your DNS.